前言 参考文章:小白学视觉
项目仓库:playground
前些天做了一个验证码识别的小项目 用到了yolo来训练,没有现成的数据所以需要自己手动打标注,在我尝试用手动工具打了几十张之后感觉怀疑人生!瞬间就不想干了。后面去找了半自动标注的相关项目,发现这个label_studio+sam的还可以。效果图先放上
SAM (Segment Anything) 是 Meta AI 推出的分割一切的模型。
Label Studio 是一款优秀的标注软件,覆盖图像分类、目标检测、分割等领域数据集标注的功能。
环境搭建 我这里选择使用conda进行安装python环境 版本尽量选择3.9以上的,不然可能会有很多环境不适配。
1
2
conda create -n rtmdet-sam python=3.9 -y
安装Pytorch
这里安装可能要很久 可以选择换源下载
1 2 3 4 5 6 7 8 pip install torch==1 .10 .1 +cu113 torchvision==0 .11 .2 +cu113 torchaudio==0 .10 .1 -f https://download.pytorch.org/whl/cu113/torch_stable.htmlpip install torch==1 .10 .1 +cpu torchvision==0 .11 .2 +cpu torchaudio==0 .10 .1 -f https://download.pytorch.org/whl/cpu/torch_stable.htmlpip install torch==1 .10 .1 torchvision==0 .11 .2 torchaudio==0 .10 .1
拉取项目
1 git clone https ://github.com/open-mmlab/playground
安装sam预训练模型
1
2
3
4
5
6
7
8
cd path/to /playground/label_anythingpython pycocotools matplotlib onnxruntime onnxcom /facebookresearch/segment-anything.gitdl .fbaipublicfiles.com /segment_anything/sam_vit_b_01ec64.pthdl .fbaipublicfiles.com /segment_anything/sam_vit_l_0b3195.pthdl .fbaipublicfiles.com /segment_anything/sam_vit_h_4b8939.pth
安装 Label-Studio 和 label-studio-ml-backend
1 2 3 4 5 pip install label-studio==1 .7 .3 pip install label-studio-ml==1 .0 .9
到这里环境依赖都安装完了
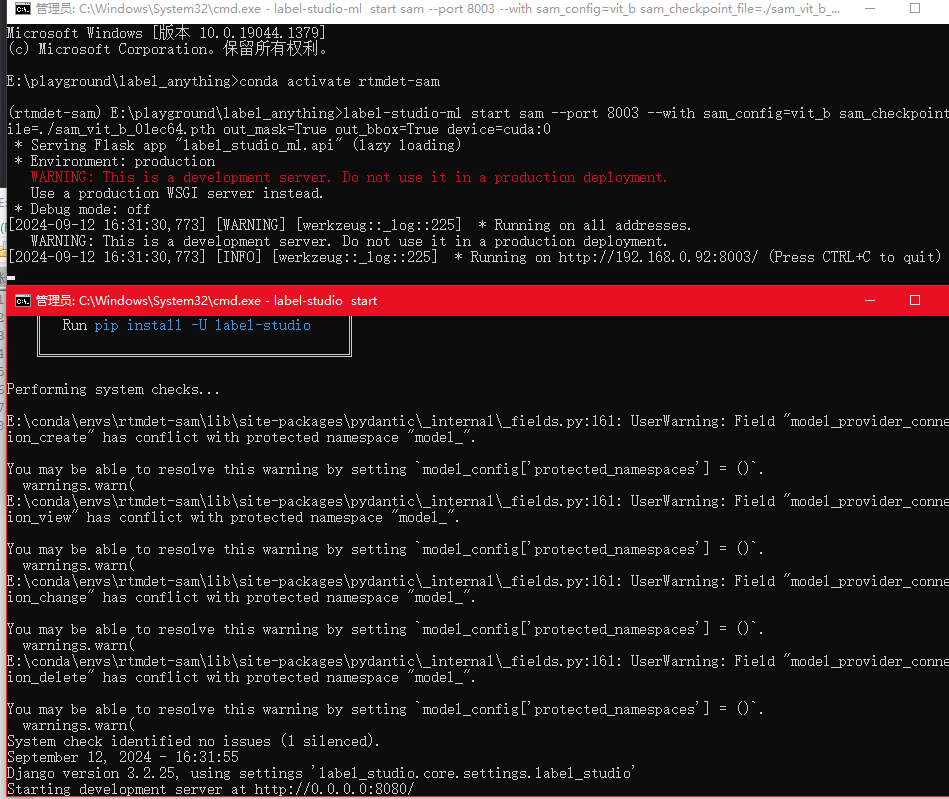
启动项目 1 2 3 4 5 6 7 8 9 10 11 12 13 14 sam_config =vit_b sam_checkpoint_file =./sam_vit_b_01ec64.pth out_mask =True out_bbox =True device =cuda:0 sam_config =vit_h sam_checkpoint_file =./sam_hq_vit_h.pth out_mask =False out_bbox =False device =cuda:0 set ML_TIMEOUT_SETUP =40
其中可能会报点错 安装一下依赖即可
启动后使用浏览器访问http://localhost:8080/ 即可进入web
使用 进入网站后先注册一个用户,这个用户仅仅是本地的。
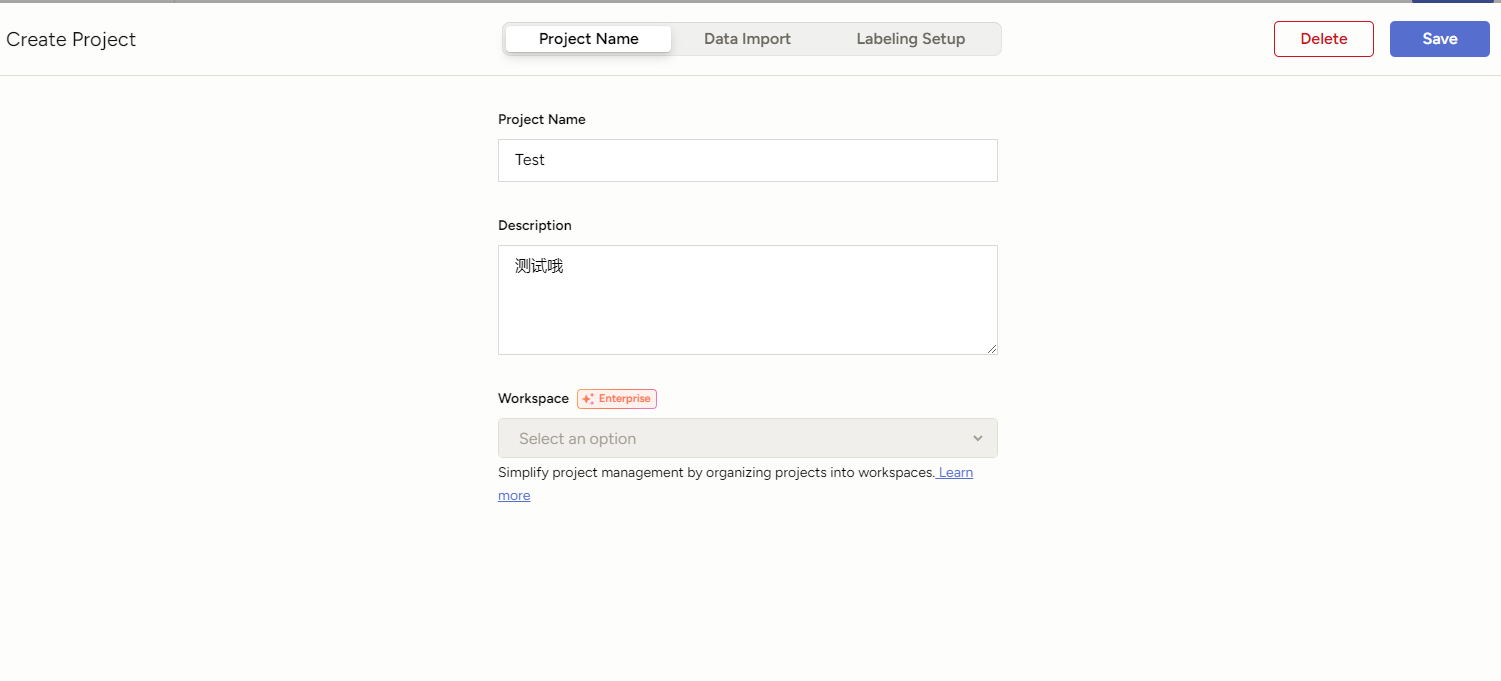
注册后创建一个OpenMMLabPlayGround 项目
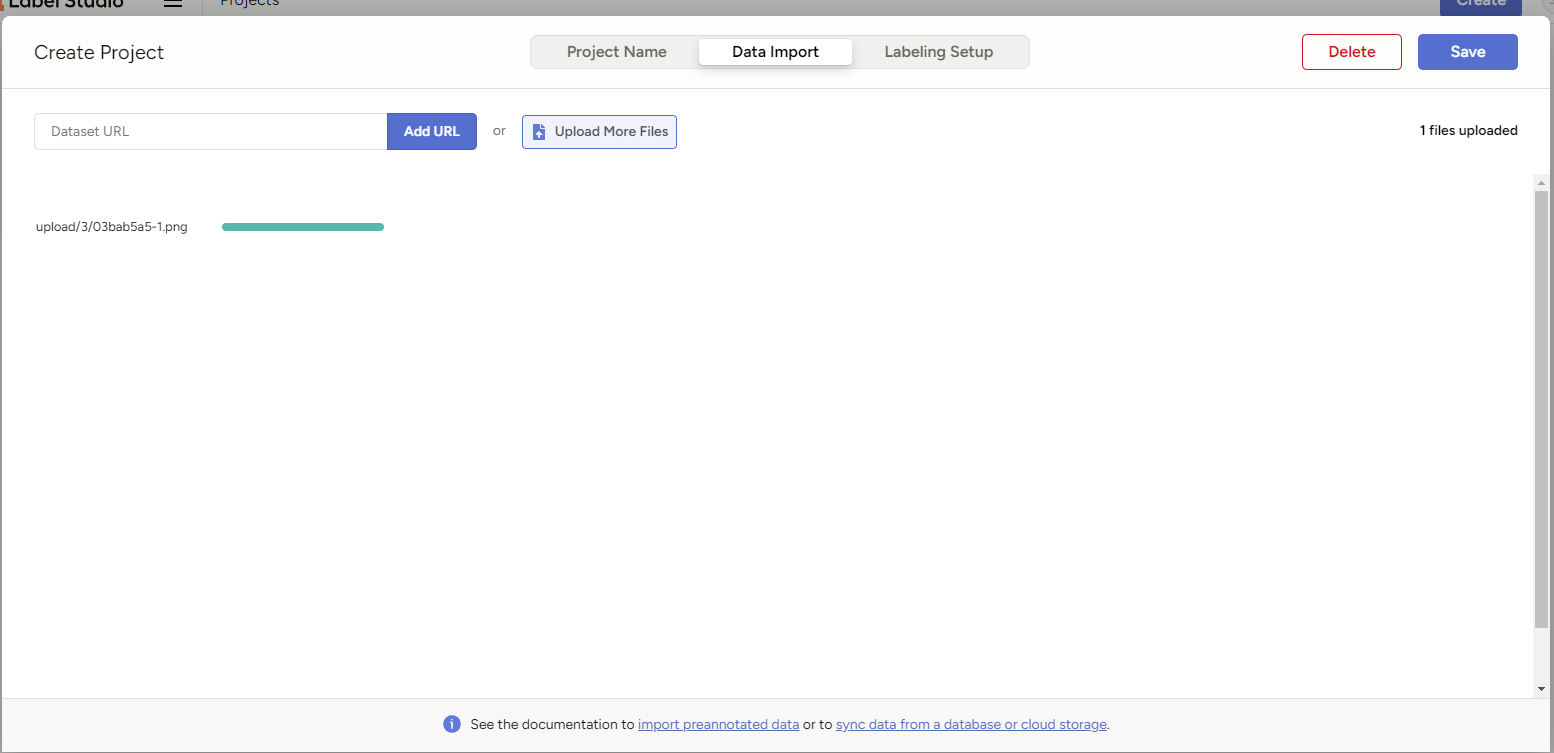
在Data Import中导入数据集
点击Save即可创建项目
进入项目在右上角在 Settings/Labeling Interface 中配置 Label-Studio 关键点和 Mask 标注。
1 2 3 4 5 6 7 8 9 10 11 12 13 14 15 16 17 18 19 <View>= "image" value= "$image" zoom= "true" />= "KeyPointLabels" toName= "image" >= "cat" smart= "true" background= "#e51515" showInline= "true" />= "person" smart= "true" background= "#412cdd" showInline= "true" />= "RectangleLabels" toName= "image" >= "cat" background= "#FF0000" />= "person" background= "#0d14d3" />= "PolygonLabels" toName= "image" >= "cat" background= "#FF0000" />= "person" background= "#0d14d3" />= "BrushLabels" toName= "image" >= "cat" background= "#FF0000" />= "person" background= "#0d14d3" />
<Label value="cat" background="#FF0000"/>代表一个分类的标签,这里需要手动添加,分类多的话就可以使用工具来做。
其中 KeyPointLabels 为关键点标注,BrushLabels 为 Mask 标注,PolygonLabels 为外接多边形标注,RectangleLabels 为矩形标注。
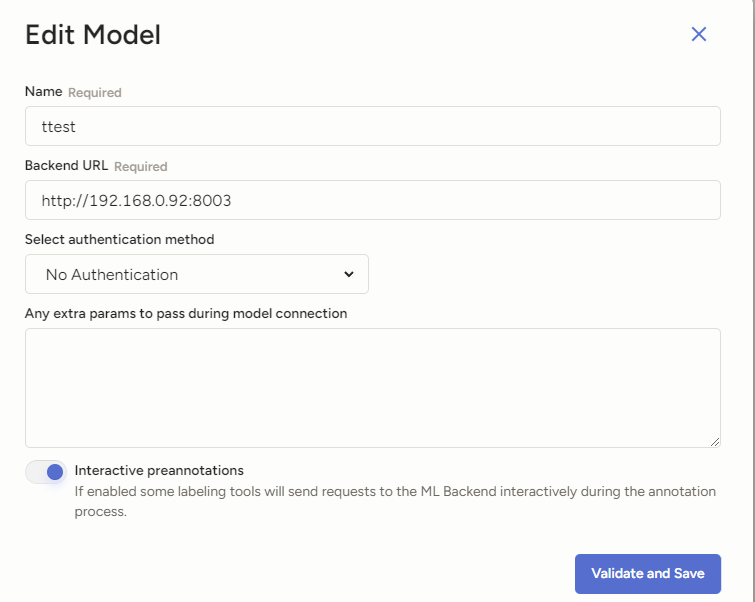
配置自动化标注模型 然后在设置中点击 Add Model 添加 OpenMMLabPlayGround 后端推理服务,设置好 SAM 后端推理服务的 URL,并打开 Use for interactive preannotations 并点击 Validate and Save。
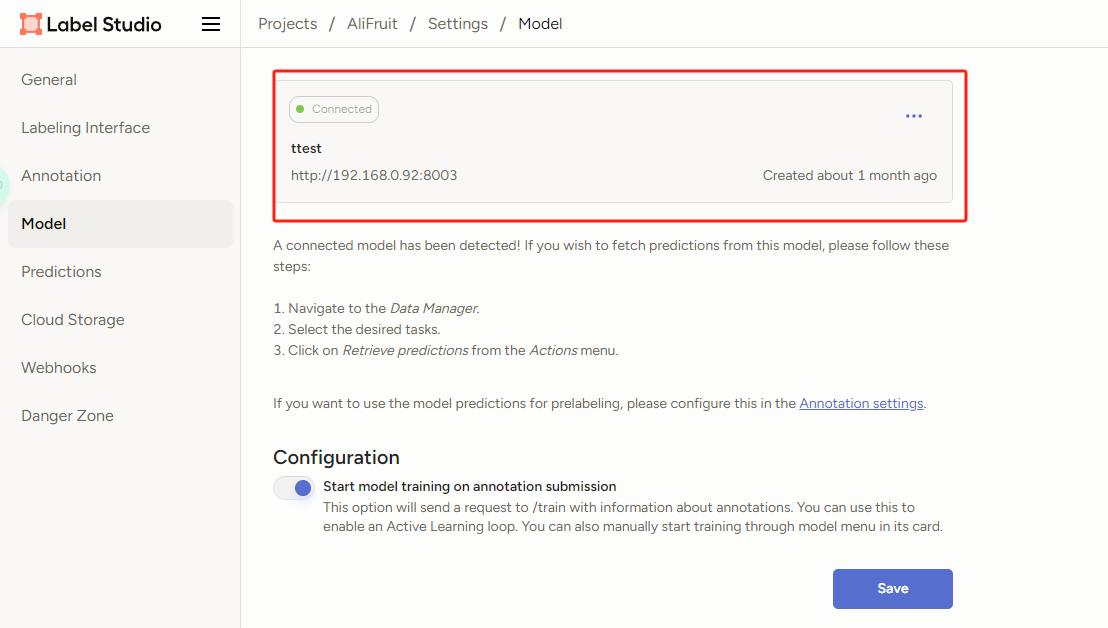
Connected连接上就说明配置成功了!
重新进入项目后点击Label All Tasks就可开始标注了
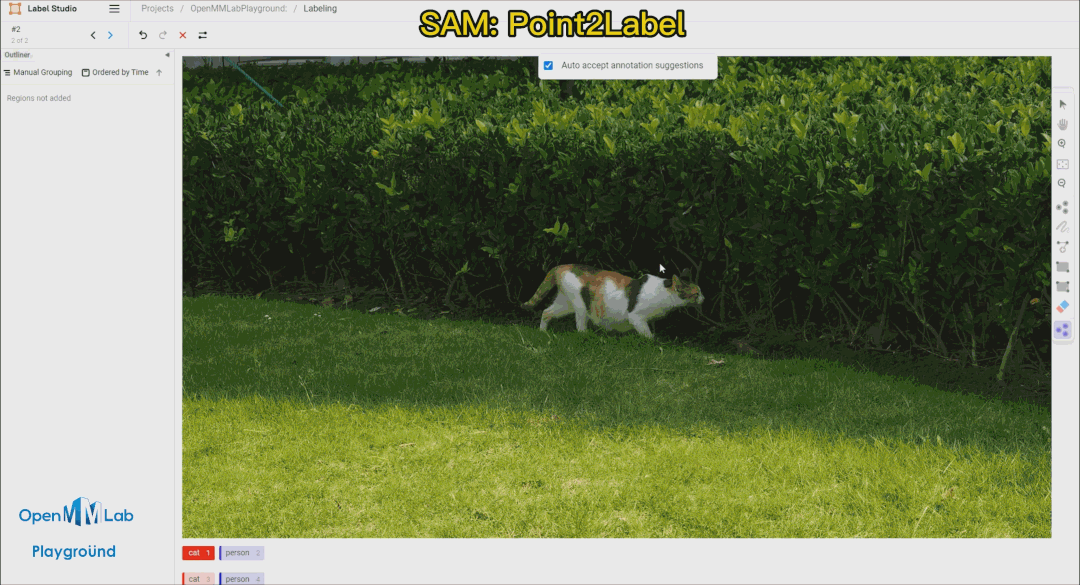
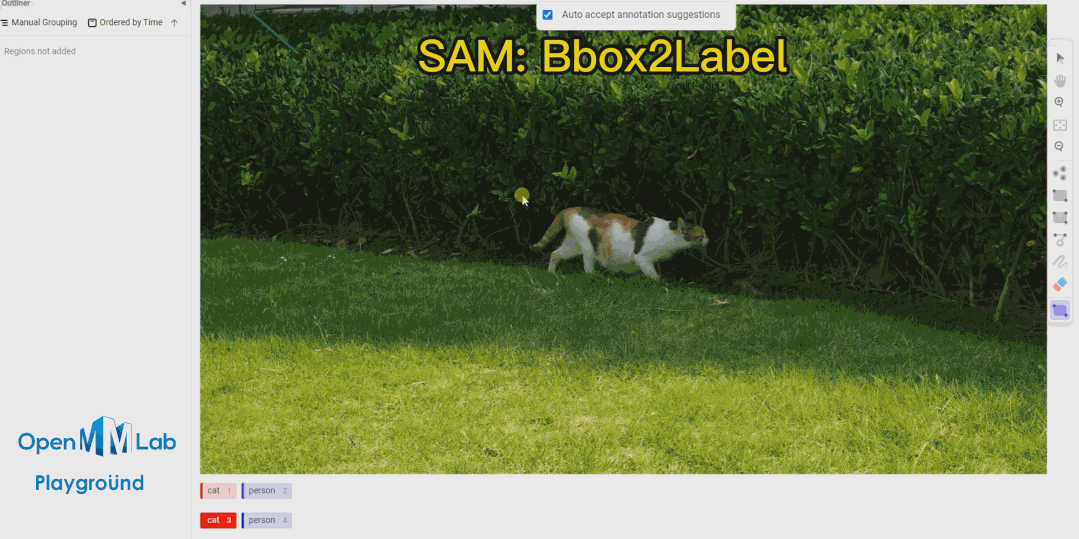
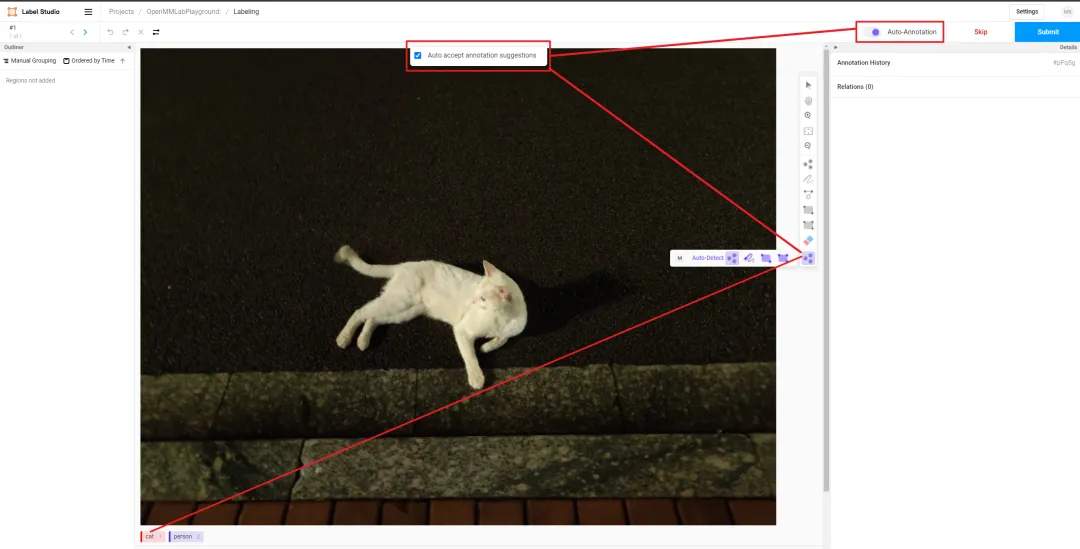
需要打开 Auto-Annotation 的开关,并建议勾选 Auto accept annotation suggestions,并点击右侧 Smart 工具,切换到 Point 后,选择下方需要标注的物体标签,这里选择 cat。如果是 BBox 作为提示词请将 Smart 工具切换到 Rectangle。
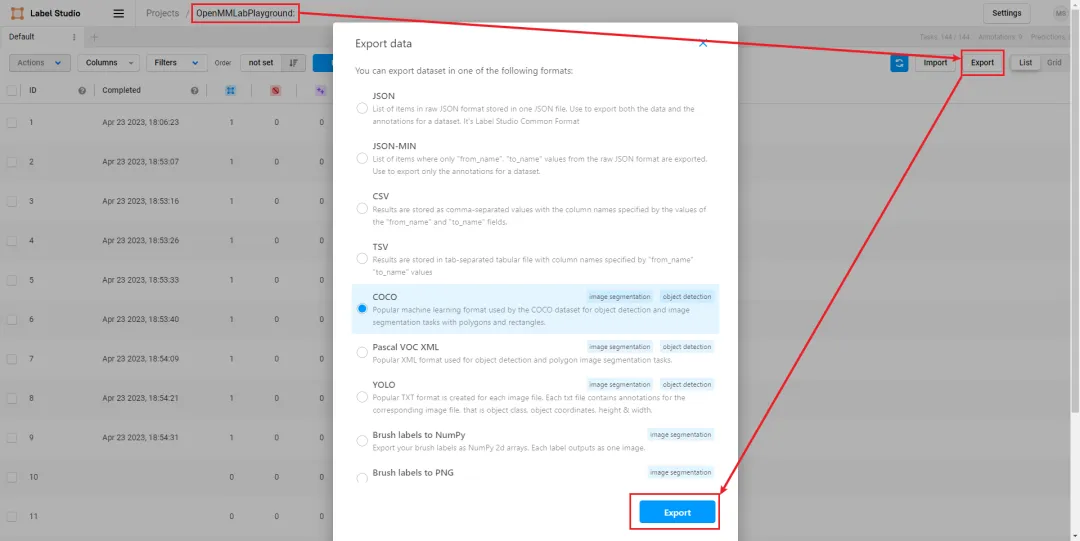
标注完成后可以选择导出